
Seasonal window maintenance
· María Fernández · Repair and maintenance · 13 min read
Windows are mechanisms that operate every day. Sashes open and close, fittings are subject to stress, and seals contract and expand with temperature changes. Without maintenance, even the most expensive windows will fail prematurely. Two simple inspections a year—in spring and fall—solve most problems before they become serious.
Why Seasonal Maintenance Is Necessary
Spain’s climate creates unique conditions for windows. Temperatures fluctuate by as much as 50 degrees from winter to summer—from -5°C in mountainous regions in winter to +45°C in Andalusia in summer. Materials expand and contract, sashes shift slightly, and seals become deformed.
On the coast, salty air increases corrosion rates on metal parts by 2-3 times. In the north, constant humidity of 75-85% promotes mold growth and destroys the lubrication in the mechanisms.
Prevention is cheaper than repair. Replacing a worn seal costs €50-80 per window, lubricating the hardware costs €20-30, or free if you do it yourself. Replacing jammed hardware costs €150-300, and replacing the entire sash due to deformation costs €400-600.
The manufacturer’s warranty often requires proof of regular maintenance. If windows fail due to lack of maintenance, warranty repairs may not be approved.
Energy efficiency declines without maintenance. Worn seals allow air to leak, and poorly sealed sashes allow drafts. This increases heating costs in winter and air conditioning costs in summer by 15-25%.
Spring Maintenance (March-April)
Spring is the time to prepare windows for the hot season after the winter months.
Washing Frames and Glass
Removing winter stains is the first step in maintenance. Over the winter, dust, salt (on the coast), and rain stains accumulate on window frames. In northern Spain, mold is also aggravated by the high humidity.
Wash the frames with warm water and a neutral detergent, such as dishwashing liquid or special window cleaners. Avoid abrasive powders, solvents, or acetone, as they scratch the plastic and damage the aluminum coating.
Pay special attention to the joints between the frame and sash and the drainage holes at the bottom of the frame. Dirt accumulates there and blocks condensation drainage.
Wash the glass with regular glass cleaner or water and vinegar (1). On the coast, salt stains can be removed with fresh water—the salt dissolves easily. For stubborn stains, add a drop of dishwashing liquid.
Avoid washing the glass in direct sunlight, as the cleaner dries before you can wipe it off, leaving streaks. It’s best to wash in the morning or evening.
Checking and Cleaning Drainage Holes
Drainage holes at the bottom of the frame drain condensation and rainwater out. Clogged holes lead to water accumulation inside the profile, mold growth, and freezing in winter.
Look for the holes—usually 5-10 mm rectangular slits on the bottom of the outer side of the frame. There can be 2 to 6 of them per window, depending on size.
Clean the holes with a thin wire, a toothpick, or a special brush. Remove any dirt, cobwebs, and any remaining foam. Check that water drains freely—pour a small amount of water inside the frame from the inside; it should flow out through the drainage holes.
Checking the Seals
Rubber seals may have compressed after winter and lost their elasticity due to the cold. Inspect them around the entire perimeter of the sash and frame.
Signs of wear:
- Cracks in the rubber surface
- Hardened, loss-of-elasticity areas
- Seal separation from the profile
- Flattened areas that do not return to their original shape
Run your hand over the seal—it should be soft, flexible, and free of tears. Cover the sash with a piece of paper and try pulling it out in different places around the perimeter. If the sheet comes out easily, the seal is worn or the sash is not sealing properly.
Cleaning the seals — wipe them with a damp cloth to remove dust and dirt. Dry and apply silicone spray or a special rubber care product. This maintains elasticity and extends the service life by 3-5 years.
Do not use oil or petroleum jelly—they destroy the rubber. Use only silicone products or special sealant compounds.
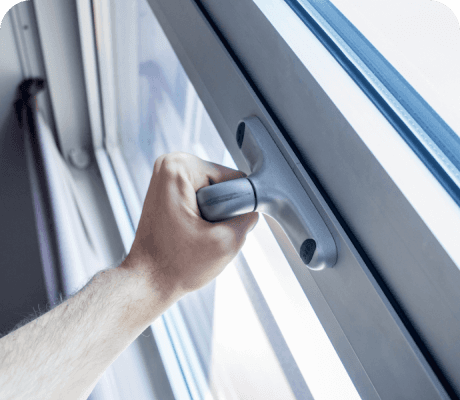
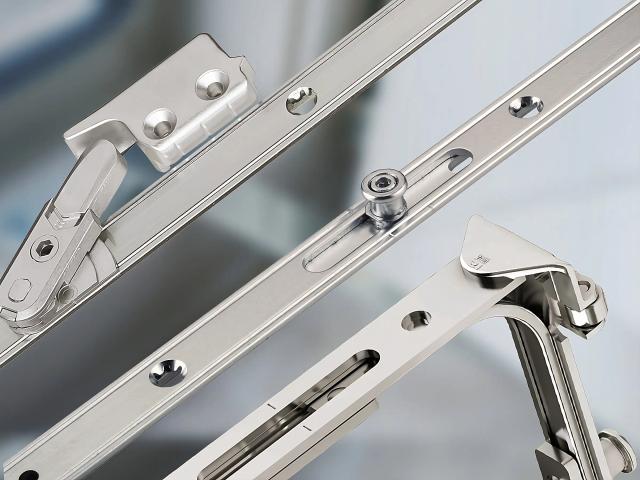
Lubricating Hardware
Moving parts of hardware require lubrication twice a year. Winter moisture washes away the lubricant, causing mechanisms to run dry, accelerating wear.
What to lubricate:
- Sash hinges – apply lubricant to the top of the hinge; it will spread throughout.
- Locking pins – protrusions on the end of the sash that engage the strike plates on the frame.
- Frame strike plates.
- Tilt mechanism stays (for tilt-and-turn windows).
- Handle lock.
Use a special lubricant for window hardware, a general-purpose lubricant like WD-40, or lithium grease in an aerosol can. Avoid thick lubricants like grease – they collect dust and clog the mechanisms.
Apply 1-2 drops of lubricant to each point, and open and close the sash several times to distribute the lubricant. Wipe off excess with a clean cloth.
The handles should turn easily, without effort or binding. If the handle is stiff, remove the decorative cover (usually turns 90 degrees), loosen two screws, and remove the handle. Clean the mechanism of any dirt, lubricate it, and reinstall it.
Summer Pressure Adjustment
Seasonal pressure adjustment extends the life of the seals and improves sash operation. In winter, a tight pressure is required to protect against the cold; in summer, it can be loosened.
Tight pressure in winter compresses the seals more tightly. In summer, at high temperatures, the materials expand, and too much pressure places excessive stress on the hinges and seals, accelerating their wear.
The pressure adjustment is performed using eccentrics (locking pins) on the end of the sash. These are oval or round protrusions with a mark or slot for adjustment.
Summer mode (low pressure):
- Turn the eccentrics so the mark faces the street or the slot is horizontal.
- Use an Allen key, pliers, or screwdriver depending on the eccentric type.
- The sash should close easily, and the handle should turn without effort.
Check the result by closing the sash and trying to open it from the inside without turning the handle. The sash should hold, but the handle should turn easier than in winter.
Checking Insect Screens
Insect screens should be inspected, cleaned, and reinstalled in the spring if removed for the winter.
Check the integrity of the screen—holes and tears should be patched with a special repair kit or the screen should be replaced. Small holes can be patched with adhesive tape for screens.
Wash the screen with soapy water and a soft sponge. Remove heavy dirt (pollen, insect residue) with a brush. Dry the screen before reinstalling.
Check the mesh fastenings to the frame—the plastic clips and the rubber cord around the perimeter. Replace any damaged parts.
Autumn Maintenance (September-October)
Autumn—prepare for the cold and wet season.
Cleaning and Removing Summer Dirt
Over the summer, windows accumulate dust, insect stains, pollen, and, in the south, sand from the Sahara Desert after the Kalima. All of this must be removed before winter.
Wash the frames the same way as in the spring—with warm water and a mild detergent. Pay attention to the outside—it accumulates more dirt from rain and wind.
After summer, the glass is often covered in dust and insect stains. Soak stubborn stains with water; do not scrape with hard objects, as this will scratch the glass.
In northern Spain, check for mold in the corners of the frames and on the slopes. Remove it with an anti-mold product or a bleach solution (1 with water). This is important before the wet season.
Checking the Airtightness
Blow-in Test - Close all windows and, on a windy day, run a lit candle or lighter around the perimeter of the sashes. The flickering of the flame indicates where drafts are leaking.
Blows occur due to:
- Worn seals
- Insufficient sash clamping
- Profile deformation
- Poor sealing of the mounting joint
If you notice any drafts, check the condition of the seals and adjust the clamping force. If this doesn’t help, call a specialist for diagnostics.
Checking the mounting joint from the outside - Inspect the sealant between the frame and the reveal. Cracks in the sealant allow cold and moisture to pass through. Reapply the sealant in problem areas before the cold weather sets in.
Winter Mode Pressure Adjustment
Switching to winter mode increases the sash pressure to protect against cold and drafts.
Winter Mode (High Pressure):
- Turn the eccentrics so the mark faces the room or the slot is vertical.
- The handle will close with greater force – this is normal.
- Check the pressure around the entire perimeter of the sash.
After adjustment, close the sash on a piece of paper – it should be difficult to pull out or tear.
Important: Do not set the maximum pressure on new windows during the first 2-3 years. The seals have not yet settled, and too much pressure will deform them. For new windows, a medium pressure setting is sufficient, even in winter.
Lubricating the Hardware
Second lubrication of the year — before winter. Summer dust gets into the mechanisms, and the lubricant dries out in the heat. Autumn lubrication will protect the hardware from moisture in the winter.
The procedure is the same as in the spring:
- Clean all moving parts of old grease and dirt.
- Apply fresh grease to the hinges, pins, strike plates, and mechanisms.
- Open and close the sash several times.
- Remove excess grease.
On the coast, use lubricants with anti-corrosion additives — they protect the metal from salty air.
Checking and Adjusting Sashes
Summer heat may have caused minor deformations of the plastic profiles. Sashes sometimes sag or shift.
Checking the Geometry — Close the sash and check that the gap between the sash and the frame is uniform around the entire perimeter. The gap should be uniform—about 3-5 mm.
If the door has sagged (the gap at the top is larger than at the bottom) or has shifted to the side, the hinges need to be adjusted.
Hinge adjustment is performed with a 4 mm Allen key:
Vertical adjustment (raise/lower the sash):
- Remove the decorative cover from the bottom hinge
- Locate the adjustment screw on the top of the hinge
- Turning it clockwise raises the sash, counterclockwise lowers it
- The adjustment range is typically ±2-3 mm
Horizontal adjustment (right/left):
- The adjustment screw is located on the side of the hinge
- Turning it moves the sash toward or away from the hinge
- Adjust both hinges for uniform movement
Sash pressure to the frame:
- There is an additional screw on the bottom hinge for adjusting the pressure
- Adjust it along with the eccentrics on the sash for uniform pressure
After adjustment, check the ease of opening and closing the sash and the tight fit along the entire perimeter.
Preparing for the rainy season
Checking the ebb and flow - Inspect the ebb and flow fastening from the outside. A loose window sill is leaking water under the window. Tighten the screws and reapply any sealant.
Make sure the window sill slopes away from the window—water should drain away, not pool. Check the drip edge—the curved edge of the window sill that directs water away from the wall.
Cleaning the inside of the window sill—remove all objects and wipe away dust. Check for water stains or mold along the edges. If there are any, there’s a leak or condensation, and the cause needs to be determined.
Seal Treatment
Preparing rubber for cold weather—use silicone spray or a special seal care product. In cold weather, untreated rubber becomes hard, cracks, and loses its seal.
Clean the seals with a damp cloth, dry them, and apply a thin layer of the product. Let it soak in for 10-15 minutes, then wipe off any excess.
The treatment creates a protective film that repels water and maintains the elasticity of the rubber at sub-zero temperatures.
Maintenance Depending on Window Material
PVC Windows
Plastic profiles require minimal maintenance. Wash the frames with regular, non-abrasive cleaners. White profiles will yellow over time from sunlight and dirt; use special cleaners to restore the whiteness of plastic.
Do not wipe colored profiles (wood-effect laminates, gray, or brown) with solvents, as this will damage the decorative coating. Use only soap and water or special cleaners for PVC.
Aluminum Windows
Aluminum is moisture-resistant, but requires careful maintenance of the coating. Wash anodized profiles with mild cleaners. Avoid acidic or alkaline detergents, as they will damage the anodized layer.
Powder coating is more durable, but also does not tolerate abrasives. Scratches on the coating indicate the onset of corrosion.
Check the condition of the thermal break—the plastic insert inside the window frame. If it’s cracked or detached, the window’s thermal insulation is compromised.
Wooden Windows
Wood requires maximum attention. Check the condition of the paintwork twice a year. Cracks, peeling, and fading are signs of weakened protection.
Renew the paintwork every 5-7 years in southern Spain, and every 7-10 years in the north. The humid climate of the north and the dry, hot climate of the south are equally damaging to wood, but in different ways.
Check for wood-boring insects. Small holes in the wood and wood dust are signs of an infestation. Insecticide treatment is required.
Signs that professional repair is needed
Do-it-yourself maintenance solves 90% of problems, but there are situations when a specialist is needed:
- The sash is deformed and won’t close even after adjustment
- The glass unit is cracked and fogged up from the inside (depressurization)
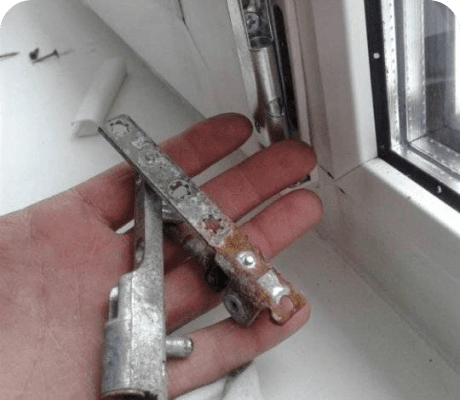
- The hardware is broken—the hinge has come off, the locking mechanism is broken
- The frame has come away from the wall, with visible gaps in the mounting seam
- Strong drafts that can’t be resolved by adjusting or replacing the seals
- Condensation on the glass from the inside of the room even after ventilation (thermal insulation problem)
Don’t attempt to repair broken hardware yourself—you could make the problem worse. Calling a specialist costs 40-80 euros, while repairs, depending on the problem, cost 80-300 euros.
Maintenance Cost
DIY maintenance is practically free:
- Hardware lubricant — €8-15, lasts for years
- Silicone spray for seals — €6-10
- Cleaning supplies — you may have at home
Time: 20-30 minutes per window twice a year.
Professional maintenance costs €50-80 per visit, plus labor:
- Comprehensive maintenance for one window — €25-40
- Seal replacement — €50-80 per window
- Sash adjustment — €30-50 per window
- Hardware repair — €80-200, depending on the damage
Most manufacturers recommend professional maintenance every 3-5 years, even with regular DIY maintenance.
These simple procedures take 2-3 hours per year for the entire house, but extend the life of windows from 15-20 to 25-30 years and maintain their energy efficiency at their original level.